
Well, the first month has come and gone. I feel like we’ve made great progress so far. It’s always hard to tell if one is on target when there isn’t really a “deadline”. However, of the ever growing TODO list, half of the items are crossed off. My goal was to spend the first two months building out enough of the system to the spend the last month making a game prototype. If the list is half complete, and we wanted to be done with the list by the end of the second month, I would say we are on track. Of course, the list is ever growing, and it’s programming, so anything can happen. 🙂
Displaying Hearts Lost When Damaged
One of the reoccurring issues we continue to hear was not knowing how much health was left when in battle. At first this made sense because we didn’t have a “flash to red” color, signaling when the player was taking damage. Once this was implemented, I thought the issue would be resolved. Alas, there were still some feedback. After having a conversation with a friend who was playing the game, I came to the realization as to why this was still a lingering issue.
First, I did some more thinking as to why this wasn’t necessarily a problem in older 2D Zelda games, as well as the 3D games. For one, the 2D games had a resolution of 256×224. With such a small resolution scaled up onto a TV, those hearts were always right within eyes view. Newer 3D Zelda games of course have much higher resolutions. Why do they work? I think it has to do with the 3D perspective. Since what we are looking at when playing those games “has depth”, our eyes aren’t necessarily fixed onto one part of the screen. Thus, we still are subconsciously able to see the health meter (hearts).
Of course, there are other factors at play — such as larger icons, longer iframes, better animations to indicate when hit (we’ll be updating our animations when we polish 🙂 ), etc. But the above was a conclusion I came to when trying to understand why older and newer games did not suffer this problem.
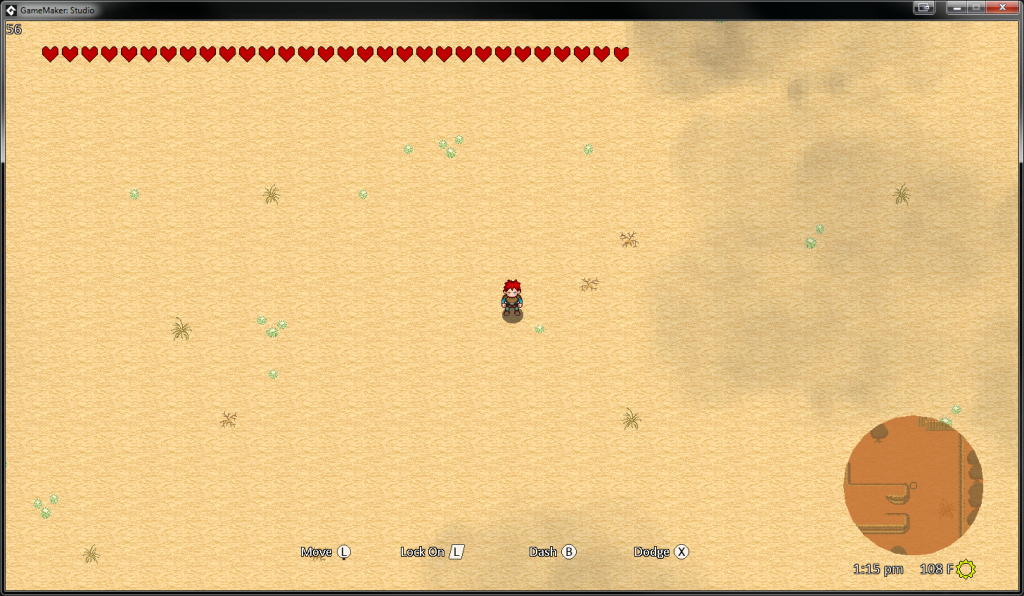
The life meter is represented by hearts in the upper left hand of the screen in the game. Essentially, each heart represents 20 units of health. If the player takes 5 units of damage, a quarter of a heart will display white. If the player takes 10 units of damage, half of the heart will display white. After taking a full 20 damage, the heart will be completely white, indicating the player lost the heart. Rinse and repeat this process until all hearts are white, equaling no health.
One of the distinguishing factors of a “Zelda” game is the health being represented by hearts. In our conversation, there were a few ideas tossed around. One for example, was to move to a health bar underneath the player, like the enemies currently. Since hearts need to represent health, this was non-negotiable.
Another idea came in the form where the hearts could be represented underneath the player. Essentially, a heart would be placed like the health bar, with the number of hearts currently remaining. Though I felt this UI would be too much “take-in” during battle, it sparked an idea. “What if when taking damage, the number of hearts lost came out of the player?” In fact, The Legend of Zelda, Skyward Sword did something similar I believe.
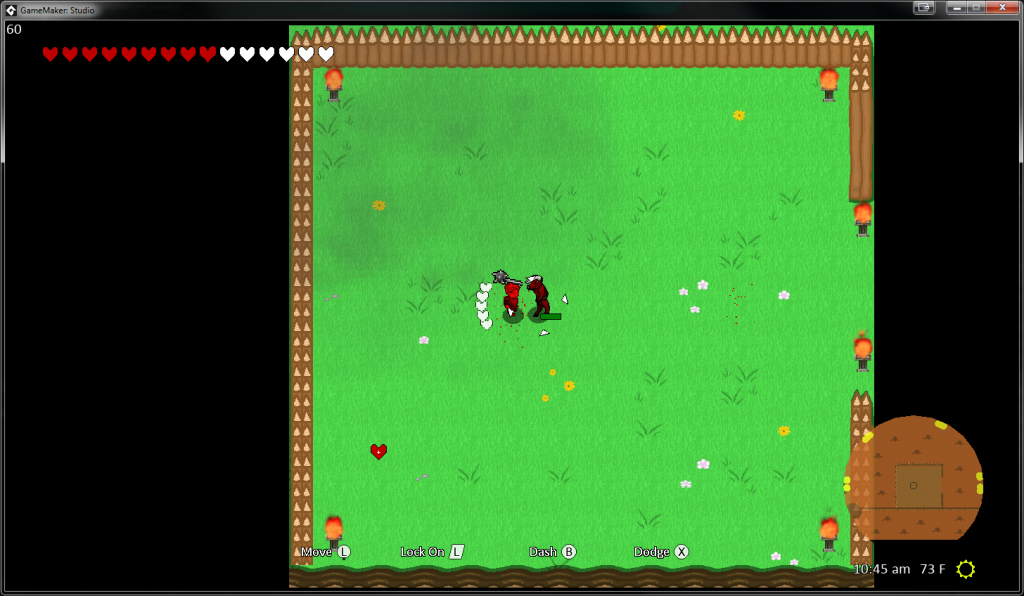
As we can see in the screenshot above, the particular attack just lost five hearts of damage. We only display the “full” hearts that were lost in the attack. What this does for the player is now they feel it necessary to take their eyes off the battle scene for a few milliseconds to see how much health they have remaining. That way, they can decide whether to battle on, play it safe, or run away.
Button Mapping Support
There is not much to say here, other than we finally got around to adding button mapping support. Those who prefer the button layout of the Xbox and Playstation will feel right at home when playing this game. There isn’t an elaborate UI for this yet. There are currently two themes to choose from: Classic or Modern. Classic feels like the old SNES and Nintendo layouts, while Modern feels more like the current button mapping of what Xbox and Playstation games do. If the “theme” idea works, we of course will add other play style themes as well. Perhaps in the game, we’ll let the player create their own too.
On Screen Tutorial
Another polish item we got around to this week was an on screen tutorial system. The first type can actually be seen in the “Lost Hearts” screenshot. This type, which I am calling Bottom Tutorial, can show a button label as well as a button icon. This is helpful for the beginning of the game when learning the controls, as well as other actions the player can perform.
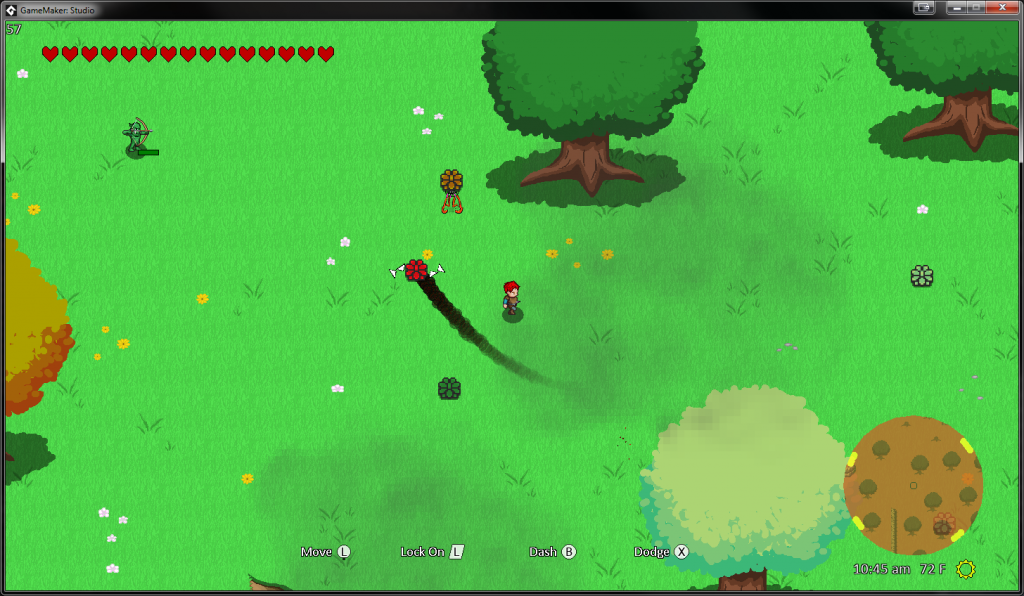
The next type is called Action Tutorial. This will show whenever an A button (B button for the Xbox players) can do something.
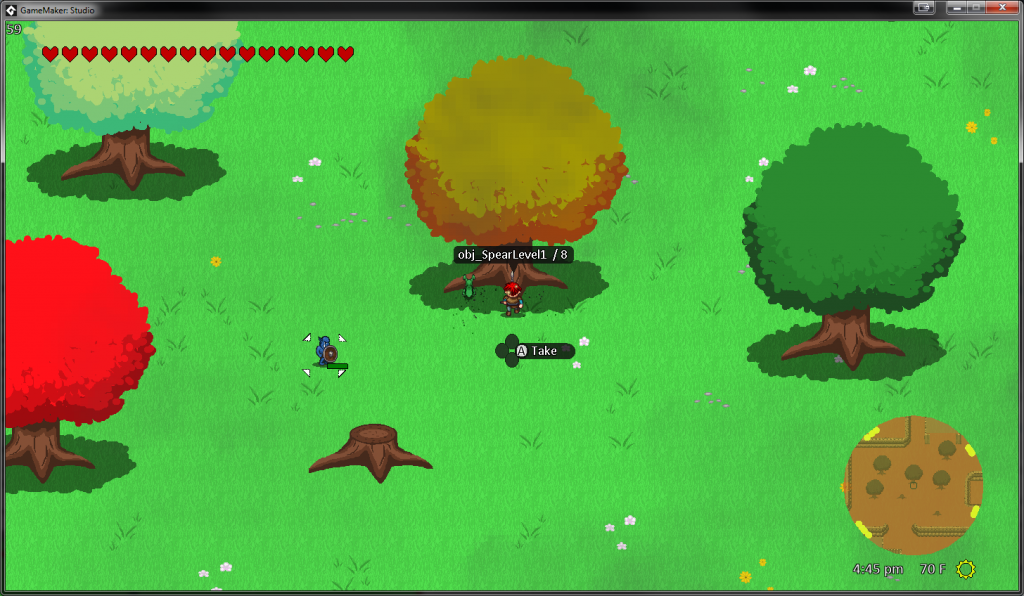
For example, in the above screenshot, we can take the weapon obj_SpearLevel1 that does 8 damage. Yes, the naming right now is just the object name, but just imagine it saying “Wooden Spear /8”. Also, the UI has updated for dropped weapons as well.
The third type is what we call Tip Tutorial. These types of messages come from the upper right of the screen to display a helpful message to the player, such as the one pictured below:
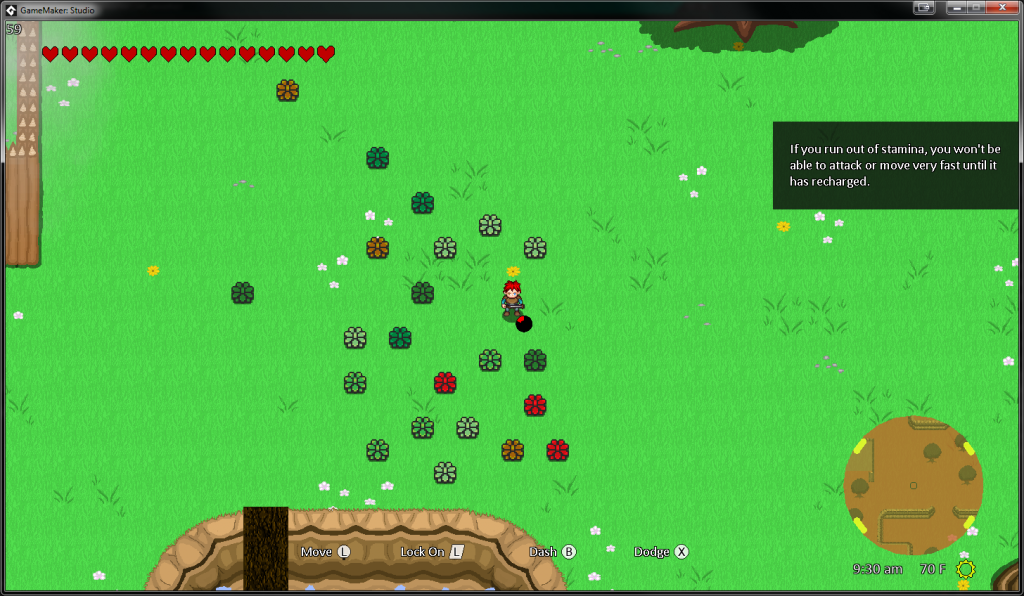
These of course will only display once and then disappear. No annoying redundant messages here!
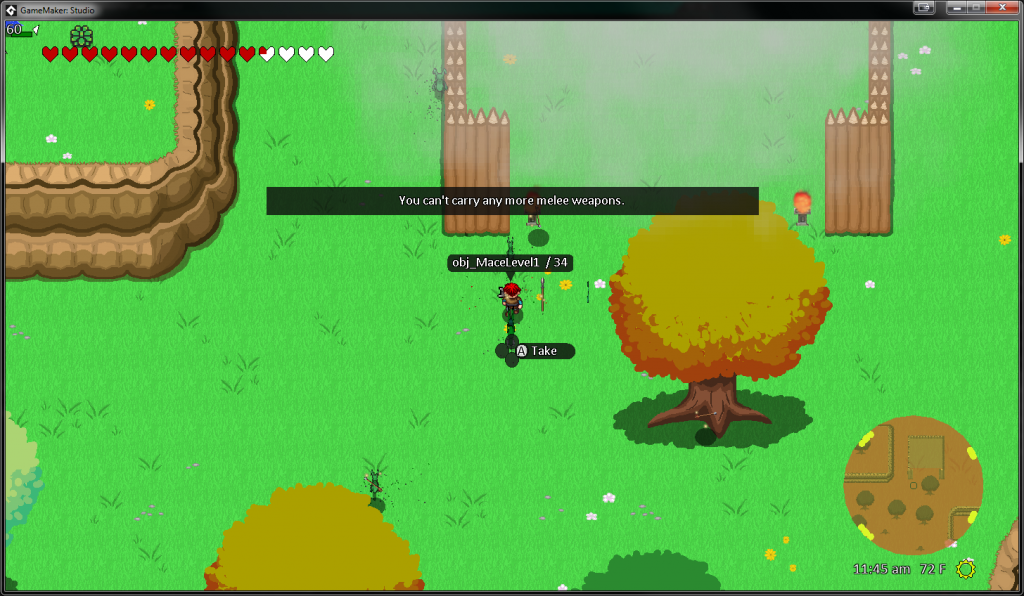
Finally, the last type, which is simply called Alert Message, will show in the upper-middle of the screen whenever something needs attention.
GML Textbox
Since we started doing so much with textboxes, we ended up refactoring the way we are rendering them. With the exception of the NPC textbox, we originally were calling GML‘s draw_text function whenever we needed to draw text. However, we needed a better way for handling text, within a certain width or height. Below we are sharing the code to generate slick textboxes within GML. This code will allow textboxes with a width and height, text shadows, left and right padding, border-radius, a fill color, alphas, and much more. Of course, all of these parameters just mentioned are optional. If we want to use the defaults, simply put -1 for the parameter. We hope another developer stumbles upon this and makes their life easier.
**Update** Draw Container is much better 🙂
/// @description draw_textbox(xx, yy, str, [anchor, font, alignment, fillAlpha, textAlpha, width, height, radius, paddingLeftRight, lineHeight, fillColor, textColor, shadowColor])
/// @param xx
/// @param yy
/// @param str
/// @param [anchor
/// @param font
/// @param alignment
/// @param fillAlpha
/// @param textAlpha
/// @param width
/// @param height
/// @param radius
/// @param paddingLeftRight
/// @param lineHeight
/// @param fillColor
/// @param textColor
/// @param shadowColor]

var mandatoryParams = 3;
var numParams = 16;
var normalParams = numParams - mandatoryParams;

var prevAlpha = draw_get_alpha();
var prevColor = draw_get_color();

var xx = argument[0];
var yy = argument[1];
var str = argument[2];

var anchor;

var fillAlpha;
var textAlpha;

var font;
var alignment;

var width;
var height;

var radius;
var paddingLeftRight;
var lineHeight;

var fillColor;
var textColor;
var shadowColor;

var args = [];

for (var i=mandatoryParams; i<argument_count; i++)
{
  args[i - mandatoryParams] = argument[i];
}

for (var i=argument_count; i<numParams; i++)
{
  args[i - mandatoryParams] = -1;
}

var autoWidth = false;

for (var i=0; i<normalParams; i++)
{
  switch (i)
  {
    case 0:
      anchor = args[i] == -1 ? fa_center : args[i];
      break;

    case 1:
      font = args[i] == -1 ? font_Standard : args[i];
      draw_set_font(font);
      break;

    case 2:
      alignment = args[i] == -1 ? fa_center : args[i];
      break;

    case 3:
      fillAlpha = args[i] == -1 ? .8 : args[i];
      break;

    case 4:
      textAlpha = args[i] == -1 ? 1 : args[i];
      break;

    case 5:
      if (args[i] == -1)
      {
        autoWidth = true;
        width = string_width(str);
      }
      else
      {
        width = args[i];
      }
      break;

    case 6:
      height = args[i] == -1 ? string_height(str) : args[i];
      break;

    case 7:
      var smaller = min(width, height);
      var larger = max(width, height);

      var ratio = smaller / larger;
      var mag = magnitude(width, height);

      radius = args[i] == -1 ? round(ratio * mag * .5) : round(args[i]);
      break;

    case 8:
      paddingLeftRight = args[i] == -1 ? 0 : args[i];
      break;

    case 9:
      lineHeight = args[i] == -1 ? string_height(str) : args[i];
      break;

    case 10:
      fillColor = args[i] == -1 ? c_modern_black : args[i];
      break;

    case 11:
      textColor = args[i] == -1 ? c_white : args[i];
      break;

    case 12:
      shadowColor = args[i] == -1 ? c_black : args[i];
      break;
  }
}

if (autoWidth)
{
  width += paddingLeftRight;
}

var halfWidth = width * .5;
var halfHeight = height * .5;

var halfPaddingLeftRight = paddingLeftRight * .5;

var startX;
var endX;

switch (anchor)
{
  case fa_left:
    startX = xx;
    endX = xx + width;
    break;

  case fa_center:
    startX = xx - halfWidth;
    endX = xx + halfWidth;
    break;

  case fa_right:
    startX = xx - width;
    endX = xx;
    break;
}

var x1 = startX;
var y1 = yy - halfHeight;

var x2 = endX;
var y2 = yy + halfHeight;

if (fillAlpha != 0)
{
  draw_set_alpha(fillAlpha);
  draw_set_color(fillColor);
  draw_roundrect_ext(x1, y1, x2, y2, radius, radius, false);
}

var textX;

switch (alignment)
{
  case fa_left:
    textX = startX + halfPaddingLeftRight;
    break;

  case fa_center:
    textX = xx;
    break;

  case fa_right:
    textX = endX - halfPaddingLeftRight;
    break;
}

draw_set_halign(alignment);
draw_set_valign(fa_middle);

draw_set_alpha(textAlpha);
draw_set_color(shadowColor);

var hashStr = string_hash_to_newline(str);

var strWidth = width - paddingLeftRight;

draw_text_ext(textX - 1, yy - 1, hashStr, lineHeight, strWidth);
draw_text_ext(textX - 1, yy + 1, hashStr, lineHeight, strWidth);
draw_text_ext(textX + 1, yy - 1, hashStr, lineHeight, strWidth);
draw_text_ext(textX + 1, yy + 1, hashStr, lineHeight, strWidth);

draw_set_alpha(textAlpha);
draw_set_color(textColor);

draw_text_ext(textX, yy, hashStr, lineHeight, strWidth);

//reset
draw_set_color(prevColor);
draw_set_alpha(prevAlpha);
draw_set_font(-1);
draw_set_halign(fa_left);
draw_set_valign(fa_middle);
A few assumptions to be made with the above:
- We are using
font_Standardas our default font. You may want to change that to be whatever you want as the default font. widthandheightare both optional. If nowidthis supplied, the textbox will grow to be the size of the text width.- When no
widthis supplied, font alignment will not do anything (since there is nothing to align to). heightis essentially a padding top and padding bottom. If text wraps because of a setwidth, make sure the height is set appropriately.
Reach out if you need help using!
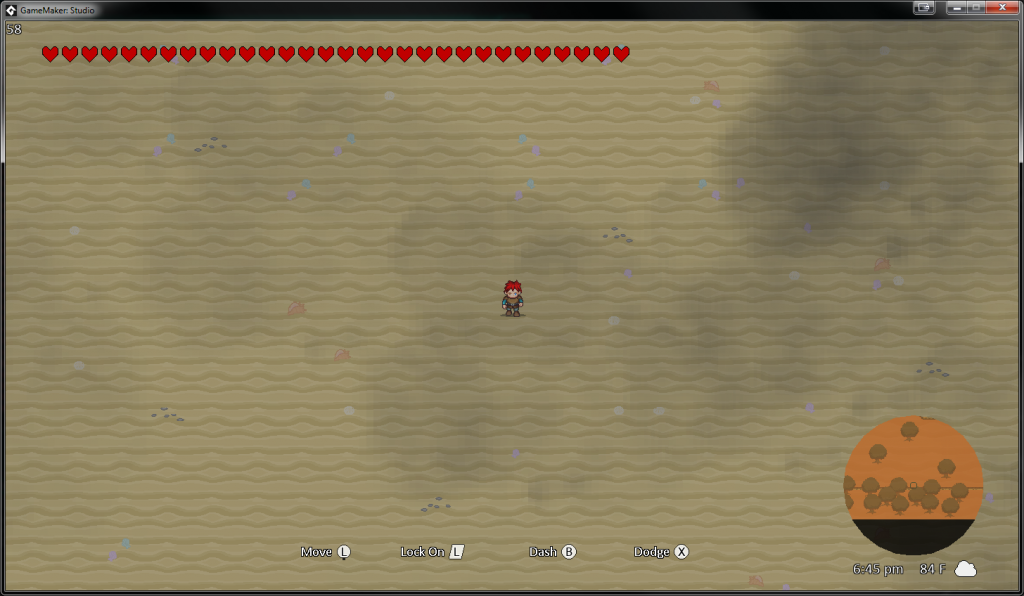
Beach and Desert Scenery
Hannah has been on a role with art lately. Here are a few screenshots of the “vanilla” areas with the tiles she has provided:
New Enemy — Ambush
The final feature accomplished this week was a new enemy I am calling Ambush. His behavior is much like the Octorok’s of Legend of Zelda: Breath of the Wild. He hides under brush, and moves around underground. When at the appropriate distance, he will pop up and shoot a rock at the player.
When I was imagining this enemy, I thought “how can I reuse the Knight Ghost?” I ended up refactoring the Knight Ghost into a RandomMovement enemy type that now Knight Ghosts and Ambushes can reuse. We may even refactor Reveels into this enemy type, as they use very similar functionality.
Conclusion
That concludes the month of January. I am really beginning to see how all of the pieces are coming together to form a game! I can’t wait to share more!